
Enable VT-x or AMD-V in the mini PC’s firmware, write the Proxmox VE 9.2 ISO to a USB stick with Etcher or Rufus in DD mode, and boot it. Install to the NVMe drive with ext4 and a static IP, open https://your-ip:8006, switch to the no-subscription repository, run a full upgrade, then create your first VM.
By LK Wood IV · Published 2026-03-31 · Updated 2026-09-22 · ~14 min read · St. Louis County, MO
Some retailer links below are Newegg and Amazon affiliate links; if you buy through them TechFuel HQ may earn a small commission at no extra cost to you. As an Amazon Associate I earn from qualifying purchases. Commissions never influence which products get recommended — see our disclosure.
Installing Proxmox on a mini PC comes down to four moves. Turn on VT-x (AMD-V on Ryzen) in the firmware. On an HP EliteDesk 800 G4 Mini, it is disabled by default; check the setting on a used machine. Write the Proxmox VE 9.2 ISO to a USB stick and install to the internal NVMe drive with ext4 and a static IP. Then, in the web UI at https://your-ip:8006, swap the enterprise repository for the free no-subscription one and run a full upgrade before you build a VM.
TL;DR · The Proxmox-on-mini-PC checklist
- Hardware: an x86-64 mini PC with VT-x / AMD-V support, 16 GB+ RAM and an NVMe slot (see the full Proxmox hardware requirements). Minisforum MS-01, ASUS NUC 14 Pro, an N150 box or a used EliteDesk 800 G4 Mini all work.
- Installer: the Proxmox VE 9.2 ISO written with Etcher, or Rufus in DD mode, to a 4 GB+ USB stick. Verify the SHA256 first. (Full hardware-agnostic install + update reference.)
- Boot: turn on VT-x / AMD-V in firmware, then boot the stick. Wipe the target SSD (NOT the USB installer). ext4 for single-disk, ZFS for multi-disk.
- First 5 minutes after install: disable the enterprise repo, enable
pve-no-subscription,apt update && apt full-upgrade -y, reboot. - First VM / LXC: upload an ISO via the web UI, click Create VM (or Create CT for a lightweight container), and you're done.
Commands checked against the Proxmox VE 9.2 documentation on September 22, 2026.
If you are still choosing hardware, the mini PC guide ranks the boxes and the Proxmox vs ESXi comparison covers the hypervisor choice. The time map below is a rough budget for a first install, with the one decision that matters at each stage:
apt full-upgrade. How long it takes depends on your connection.What You Need Before You Start
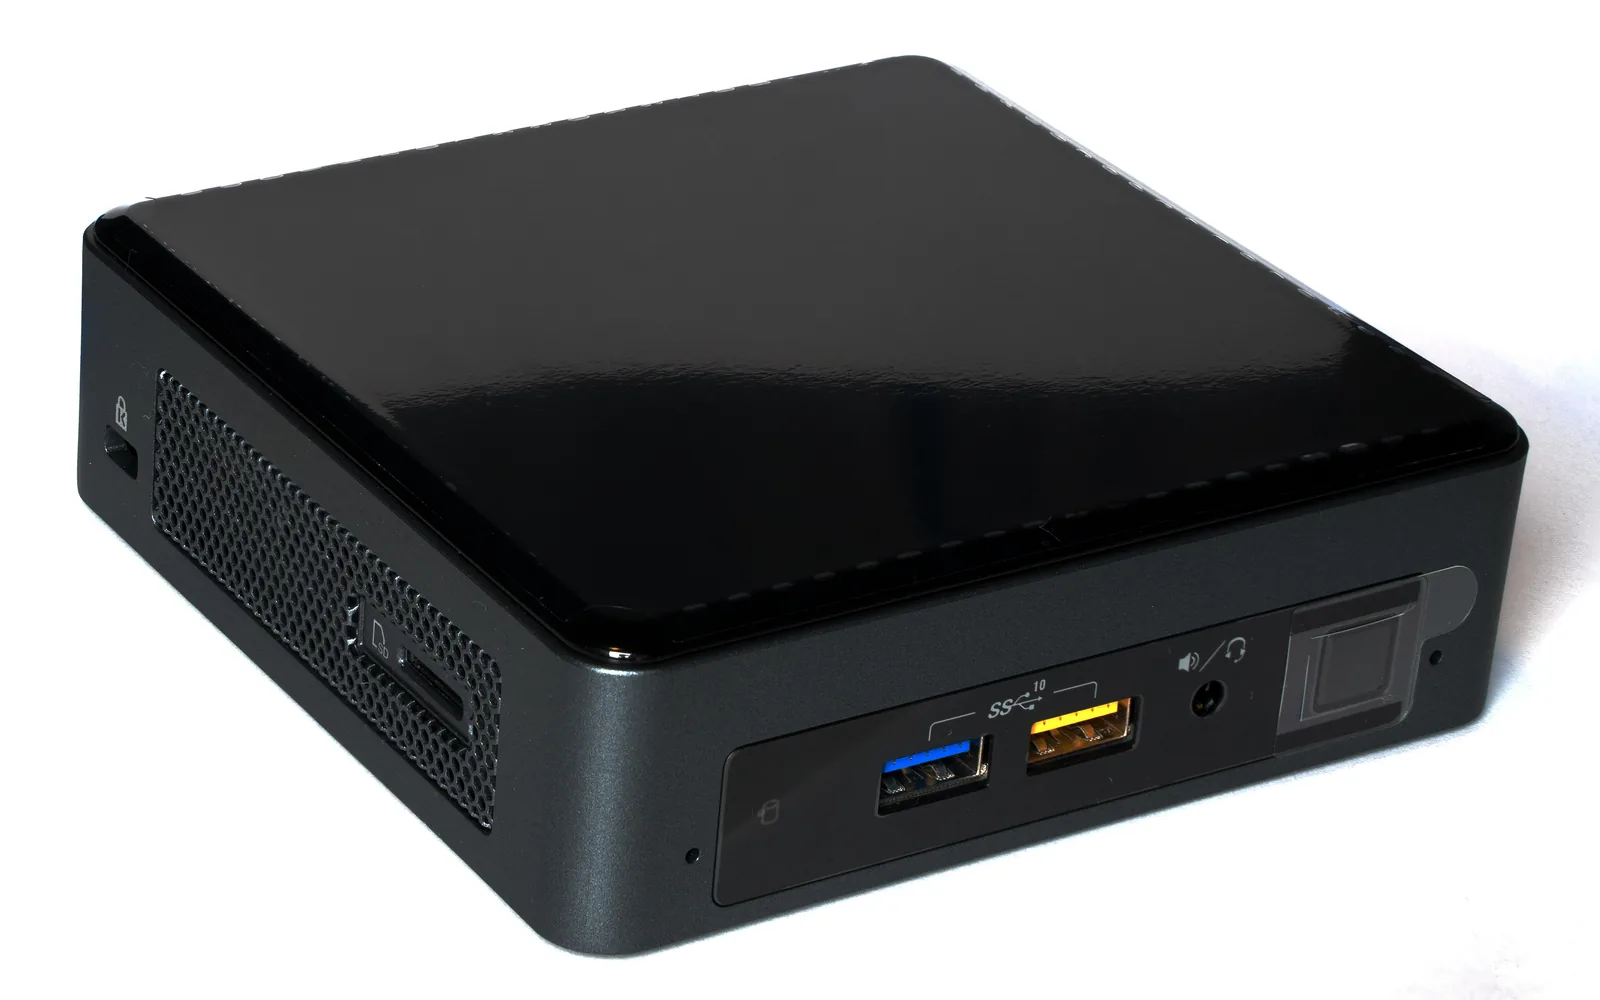
- A mini PC — an x86-64 machine with VT-x / AMD-V support works: a Minisforum MS-01, a Beelink SER8, an Intel N150 box or a used HP EliteDesk 800 G4 Mini. The mini PC guide compares them. An old laptop or desktop works too: you can repurpose an old gaming PC as a Proxmox server, or weigh the used-enterprise route.
- A USB drive — 4GB minimum; the 9.2 ISO is 1.71 GB, and writing it overwrites the stick.
- RAM installed — at least 8GB. 16GB or more if you plan to run ZFS.
- An NVMe or SSD — for the Proxmox boot drive. 256 GB is enough for Proxmox, ISOs and a few small guests.
- Ethernet cable and a network with DHCP — Proxmox needs a wired network connection. Wi-Fi is not supported during install.
- Another computer — to download the ISO and access the Proxmox web UI after install.
Buying the hardware?
This guide uses two buy-new boxes, the Minisforum MS-01 (dual 10GbE SFP+) on Newegg or Amazon, and the Beelink SER8 on Newegg or Amazon. For a 256GB NVMe boot drive, try Newegg or Amazon. For the value path, a used EliteDesk 800 G4 Mini costs less still.
Step 1: BIOS Configuration (5 Minutes)
Before anything touches a USB drive, get into the BIOS. On most mini PCs, press Delete or F2 during boot. Minisforum uses Delete. Beelink uses Delete or F7.
On an HP EliteDesk 800 G4 Mini, press F10 for Computer Setup and F9 for the boot menu. HP's service guide for the 800 G4 Desktop Mini lists Virtualization Technology (VTx) and VTd under Advanced > System Options, both disabled by default. Enable VTx and save. Then shut the machine down completely. HP's guide says the change needs the computer turned off and then back on.
Change these settings:
- Enable VT-d / IOMMU if you need PCI passthrough — this controls direct assignment of a PCI device to a VM, not ordinary VM execution. Some BIOS labels it "Intel VT for Directed I/O" or "VT-d." On AMD, look for "IOMMU" or "AMD-Vi." See the official passthrough requirements.
- Enable VT-x / AMD-V — hardware virtualization for KVM on these Intel/AMD mini PCs, listed in the Proxmox system requirements. Many boxes ship with it on; the EliteDesk above defaults to off.
- Set boot order — put USB first so you can boot the installer. You'll change this back after installation.
- Check Secure Boot support — Proxmox VE 8.1 and newer installation media support Secure Boot. Keep it enabled for a supported current installation. The official installer guide calls for disabling it with installers older than 8.1; the installer's separate memtest86+ entry also needs it off. If USB boot fails, check the media version and firmware error before changing this setting.
Save and exit.
Step 2: Write the Installer USB (5 Minutes)
On your other computer, download the Proxmox VE 9.2 ISO installer. On September 22, 2026 the download page listed version 9.2-1 at 1.71 GB, dated May 21, 2026, with its SHA256 sum beside it. Check the file against that sum. The Proxmox roadmap gives the same date. It builds 9.2 on Debian 13.5 with kernel 7.0 and ZFS 2.4.
Proxmox's installation-media guide names two Windows tools for writing the ISO. Etcher works out of the box. Rufus needs DD mode. After you press Start, answer No when it offers to download a different version of GRUB, then pick DD in the next dialog. The same guide warns that UNetbootin does not work with the Proxmox image. On Linux or macOS, the guide's dd command does the job.
Ventoy is not on Proxmox's list. Already boot everything from a Ventoy stick? Try it, and keep Etcher as the fallback if the installer misbehaves.
Step 3: Run the Proxmox Installer (10 Minutes)
Target Disk and Filesystem
Select the internal NVMe drive as the target. The installer wipes whatever disk you select. That includes the USB stick if you pick it by mistake. The Options button sets the filesystem.
- ext4 (default) — simple, fast, reliable. If you have a single NVMe boot drive and no plans for advanced storage features, ext4 is the right choice. It uses the standard LVM-thin (local-lvm) layout, which Proxmox knows how to manage natively.
- ZFS — checksumming, snapshots, compression, and self-healing. If you have two identical drives, ZFS mirror gives you redundancy. The tradeoff: ZFS uses ARC (a read cache) that can consume RAM aggressively. A fresh Proxmox VE 8.1+ install caps it at 10% of RAM (max 16 GiB); on a 16GB system, verify that limit after install, because without that installer-set limit, ARC can use up to 62.5% of your memory on ZFS 2.3 and later. More on this below.
- XFS / BTRFS — XFS sits on the same LVM layout as ext4. BTRFS is still a technology preview in the Proxmox installer, so skip it on the boot drive.
For a first install I'd put ext4 on a single NVMe. You can add ZFS pools later for data drives. Keep the boot drive simple.
Network Configuration
The installer asks for a hostname (use something like pve.local), an IP address, gateway, and DNS server. If your network has DHCP, the installer will auto-fill these. I'd recommend setting a static IP instead — pick something outside your DHCP range (like 192.168.1.200) so the Proxmox web UI always lives at the same address.
The installer creates a Linux bridge called vmbr0 attached to your first physical NIC. This is how your VMs and containers will reach the network. If your mini PC has multiple NICs (the MS-01 has four), only the first one gets bridged during install. You'll configure the rest later.
Root Password and Email
The installer requires a root password of at least 8 characters, and Proxmox recommends 12 or more. The email address receives system notifications, such as available package updates and errors from periodic cron jobs. Use a real one if you want those emails.
Hit Install. Wait about five minutes. Proxmox writes to the NVMe, reboots, and you'll see a console login screen with a URL displayed.
Step 4: Post-Install Configuration (10 Minutes)
The console screen shows an address such as https://192.168.1.200:8006, with your own IP in place of that example. Open it in a browser on your other computer. You'll get a certificate warning — that's normal, Proxmox uses a self-signed cert. Accept it and proceed.
Log in as root with the password you set. You're now in the Proxmox web UI. Before you touch anything else, fix the repositories.
Fix the Repositories in the Web UI
A fresh Proxmox VE 9 install points at the enterprise repository, which needs a paid subscription key. Until you swap it, apt update fails against that repository. On PVE 9 the fix takes a few clicks in the web UI:
- Go to Datacenter > your node > Updates > Repositories.
- Select the
pve-enterpriserow (and theceph … enterpriserow if present) and click Disable. - Click Add, choose No-Subscription from the dropdown, and confirm.
- Back on the Updates tab, click Refresh, then Upgrade.
The web UI writes the correct files for you. Proxmox's repository docs describe the no-subscription repository as suitable for testing and non-production use, with packages that are not always as heavily tested and validated as the enterprise ones.
Or Do It From the Shell — But Use the Right Format
Proxmox VE 9 is built on Debian 13 ("trixie") and ships its repositories as deb822 .sources files. Guides written for PVE 8 add a one-line bookworm entry to a .list file; on 9 that points apt at the previous Debian release and leaves the enterprise .sources entry enabled, so the errors continue. The PVE 9 version, following the repository docs:
# 1. Disable the enterprise repo (it lives in a deb822 .sources file on 9)
sed -i '/Components: pve-enterprise/a Enabled: no' \
  /etc/apt/sources.list.d/pve-enterprise.sources
# (the Ceph enterprise entry, if present, reads "Components: enterprise")
sed -i '/Components: enterprise/a Enabled: no' \
  /etc/apt/sources.list.d/ceph.sources 2>/dev/null
#
# 2. Add the free no-subscription repo (deb822 format, trixie suite)
cat > /etc/apt/sources.list.d/proxmox.sources <<'EOF'
Types: deb
URIs: http://download.proxmox.com/debian/pve
Suites: trixie
Components: pve-no-subscription
Signed-By: /usr/share/keyrings/proxmox-archive-keyring.gpg
EOF
#
# 3. Update and upgrade
apt update && apt full-upgrade -y
Upgrading an older box to 9 and staring at leftover .list files? The repository docs point to apt modernize-sources, which migrates most of them to the .sources layout that Debian 13's apt expects. The PVE 8 to 9 upgrade guide covers the rest of that path.
Remove the Subscription Nag (Optional)
Every time you log into the web UI, Proxmox shows a popup reminding you to buy a subscription. It's annoying but harmless. Community scripts exist to remove it, but they break on every update. My advice: just click "OK" and move on. It takes one second and it doesn't affect functionality.
Check the ZFS ARC Limit (If You Used ZFS)
ZFS keeps a RAM read-cache called ARC, and the internet is full of "ZFS ate half my memory" horror stories. Good news: those are out of date. Since Proxmox VE 8.1, a fresh install already caps ARC at 10% of installed RAM (max 16 GiB) and writes that limit to /etc/modprobe.d/zfs.conf for you. Verify it's there:
cat /etc/modprobe.d/zfs.conf
# a fresh PVE 9 install shows: options zfs zfs_arc_max=...
You still touch this in two cases.
- You upgraded an old box to 9 — pre-8.1 installs never got a
zfs.confentry, so ARC runs on the ZFS default, which is 62.5% of RAM from ZFS 2.3.0 on (50% before). Set a limit yourself. - You want a different split — on a 16 GB mini PC the 10% default (~1.6 GB) can be stingy for a storage-heavy pool; on a 64 GiB box the default is 6.4 GiB, below the 16 GiB cap. Tune it:
# Example: cap ARC at 4 GiB (4 * 1024^3 bytes)
echo "options zfs zfs_arc_max=4294967296" > /etc/modprobe.d/zfs.conf
update-initramfs -u -k all   # only needed if your ROOT filesystem is ZFS
reboot
Proxmox's own sizing rule is at least 2 GiB plus 1 GiB per TiB of pool storage, and it warns that cutting ARC costs IO performance. On a 16 GB mini PC the 10% default is about 1.6 GB, under that floor. Raise it if disk-heavy guests feel slow. Leave it if your guests need the RAM more.
Step 5: Network Bridge Configuration (5 Minutes)
Proxmox created vmbr0 during installation, bridged to your first NIC. Every VM and container you create will use this bridge to reach the network by default. For a single-NIC mini PC like the Beelink SER8, you're done — everything shares that one interface.
For multi-NIC mini PCs like the MS-01 (which has four ports — two 10GbE SFP+ and two 2.5GbE RJ45), you'll want additional bridges.
In the web UI, go to your node > System > Network > Create > Linux Bridge. Name it vmbr1, select the second physical interface, and optionally assign it to a VLAN or separate subnet. Common patterns:
vmbr0on the 2.5GbE port — management + general VM trafficvmbr1on a 10GbE SFP+ port — dedicated storage or inter-node trafficvmbr2on the second 2.5GbE — WAN interface for a pfSense/OPNsense VM
Don't overcomplicate this on day one. One bridge works. Add more when you have a specific reason.
Step 6: Understanding Storage Layout
After a default ext4 install, you'll see two storage entries in the web UI:
- local — a directory on the boot drive. Stores ISO images, container templates, backups, and snippets. Think of it as the file shelf.
- local-lvm — an LVM-thin pool on the boot drive. Stores VM disks and container root filesystems. This is where your actual workload data lives.
Upload your ISO images (Ubuntu, Debian, Windows) to local via the web UI: select the "local" storage > ISO Images > Upload. Container templates download directly through the UI: select "local" > CT Templates > Templates.
If you have a second NVMe or SSD, you can create an additional storage pool for VM disks. In the shell:
# Create a new directory storage on a second drive
# (assuming it's mounted at /mnt/data)
pvesm add dir data-store --path /mnt/data --content images,rootdir
If you installed on ZFS, the installer created the pool and Proxmox registered it. You can create additional datasets for different workloads via the CLI or the web UI.
Step 7: Create Your First VM (10 Minutes)
Click "Create VM" in the top right of the web UI. Here are the settings that matter:
- General — give it a name. VM IDs auto-increment from 100.
- OS — select the ISO you uploaded. Set the OS type (Linux or Windows).
- System — leave defaults for Linux. For Windows 11: set Machine to q35, BIOS to OVMF (UEFI), and add a TPM. Check "Qemu Agent" if you'll install it in the guest.
- Disks — allocate disk space on local-lvm. 32GB is fine for a test Linux VM. Keep the default SCSI bus on the VirtIO SCSI single controller with IO Thread ticked; Proxmox's VM docs recommend it for performance, make it the default for new Linux VMs since 7.3, and describe VirtIO Block as the older controller it superseded. Windows needs VirtIO drivers loaded during install (download the VirtIO ISO from the Proxmox wiki).
- CPU — the wizard defaults to
x86-64-v2-AES. On a single mini PC with no live migration, set the type to "host" for the full CPU feature set. Allocate 2 cores to start. You can change this later without rebuilding the VM. - Memory — 2048MB (2GB) for a minimal Linux VM. 4096MB for anything you want to actually use. Enable ballooning to let Proxmox reclaim unused memory.
- Network — bridge vmbr0, model VirtIO. That's the fast paravirtualized NIC.
Click Finish. Start the VM. Open the Console tab and you'll see the OS installer booting. Install your OS as normal.
On an Intel mini PC, finish the Step 4 upgrade before you create a Windows 11 VM with CPU type "host". The 9.2 release notes list intermittent freezes for Windows 11, Server 2022 and Server 2025 guests on Intel hosts with that CPU type and Virtualization-based Security enabled, and new VMs made with the packages on the 9.2 ISO can be affected; qemu-server 9.2.0 fixes it with machine version 11.0+pve2. For an existing Windows VM using machine version 11.0 or 11.0+pve1, also set its machine version to 11.0+pve2 or newer after upgrading. Linux guests are not on the list.
After the OS is installed, install the QEMU Guest Agent inside the VM (apt install qemu-guest-agent on Debian/Ubuntu). This lets Proxmox see the guest's IP address, run graceful shutdowns, and freeze the filesystem for consistent snapshots.
Step 8: Create Your First LXC Container (5 Minutes)
LXC containers are the reason most homelabbers prefer Proxmox over ESXi. They share the host kernel, start in seconds, and skip the guest OS a full VM has to carry. The LXC vs VM guide covers when each one fits.
Click "Create CT" in the top right. The process:
- General — set a hostname and a root password. Check "Unprivileged container" (the default and the secure option).
- Template — select a template from local storage. If you haven't downloaded one yet, go to local > CT Templates > Templates and grab "debian-13-standard" or "ubuntu-26.04-standard." Both were in Proxmox's template index on September 22, 2026.
- Disks — 8GB is plenty for a lightweight service. Allocate more if the container will store data.
- CPU — 1 core is fine for most containers. Pi-hole, Uptime Kuma, a reverse proxy — they don't need more.
- Memory — 512MB for light services. 1024MB if you're running something heavier.
- Network — bridge vmbr0, DHCP or static IP. Same network as your VMs.
Click Finish. Start it. Open the Console. You're inside a Debian or Ubuntu environment in under ten seconds. Install Docker, deploy a service, and you're self-hosting. The self-hosting essentials guide covers what to run first.
If You're Running Docker in This Container
For Docker to work inside an unprivileged LXC, you need to enable nesting. In the web UI: select the container > Options > Features > check "Nesting." Alternatively, from the Proxmox shell:
# Enable nesting and keyctl for container 101
pct set 101 -features nesting=1,keyctl=1
Restart the container, install Docker, and confirm the overlay2 storage driver is active with docker info | grep Storage. Proxmox's container docs still recommend nesting application containers inside a VM when you need maximum isolation or live migration.
Common Gotchas That Trip Up New Users
The Web UI Uses HTTPS on Port 8006
If you type http:// (no S) or forget the port number, the page won't load and you'll think the install failed. Use https://YOUR-IP:8006.
The Enterprise Repo Error
If you see 401 Unauthorized when running apt update, you haven't swapped the repos yet (Step 4). Disable the enterprise repo and add the no-subscription one. If you tried the shell method and the error persists, look for a leftover PVE 8 bookworm .list entry; PVE 9 uses deb822 .sources files.
VMs Won't Start — "KVM Not Available"
Check whether VT-x / AMD-V hardware virtualization is enabled in BIOS (Step 1). VT-d / IOMMU is a separate requirement for PCI passthrough, not a substitute for CPU virtualization. If virtualization is already enabled, use the VM's task log to identify the next failure instead of changing unrelated firmware settings.
Container Networking Broken After Reboot
Usually means the bridge (vmbr0) lost its configuration. Check /etc/network/interfaces on the Proxmox host — the bridge definition should be there. If you edited it manually and made a typo, networking breaks silently. The web UI's network editor is safer for beginners.
ZFS Ate All My RAM
Almost always an older box you upgraded to 9 — fresh PVE 9 installs cap ARC at 10% automatically. Check /etc/modprobe.d/zfs.conf; if it's empty, ZFS is running on its own built-in default, which the Proxmox docs put at 62.5% of RAM from ZFS 2.3.0 on. PVE 9.2 ships ZFS 2.4, so that is the figure you get. Set a limit (Step 4) and reboot.
Who Should Do This
Skip this if:
- You only need to run two Docker containers — install Docker directly on Ubuntu, you don't need a hypervisor
- You want a NAS with an appliance interface — look at TrueNAS or Unraid instead
What You've Built
You now have Proxmox VE 9 on the mini PC, updating from the no-subscription repository, with one VM and one LXC container on the vmbr0 bridge.
The next step is deploying services. Start with Pi-hole for DNS ad blocking, then Uptime Kuma for monitoring. If a GPU or a second NIC should go straight to one VM, the GPU passthrough guide covers IOMMU groups and the VT-d setting from Step 1.
Key takeaways: Proxmox on a mini PC
- Firmware first: VT-x or AMD-V must be on. The HP EliteDesk 800 G4 Mini defaults to VTx disabled under F10 > Advanced > System Options and needs a full power-off after the change.
- Installer stick: the Proxmox VE 9.2 ISO (9.2-1, 1.71 GB) written with Etcher, or Rufus in DD mode, to a 4 GB+ USB drive.
- Boot drive: ext4 on a single NVMe for the first install; ZFS when you have two matching drives and 16 GB+ of RAM.
- Before the first VM: disable the enterprise repository, add no-subscription, run
apt full-upgrade. On an Intel box that upgrade also brings the qemu-server 9.2.0 fix for Windows 11 guests with CPU type “host”. - Which mini PC: the mini PC guide ranks the MS-01, NUC 14 Pro, SER8 and used business minis; the Proxmox hardware requirements page covers RAM and storage sizing.
Sources
Commands and version facts checked on September 22, 2026.
- Proxmox VE roadmap: 9.2 released May 21, 2026, on Debian 13.5 with kernel 7.0 and ZFS 2.4; the Windows 11 freeze on Intel hosts with CPU type “host” and its qemu-server 9.2.0 fix
- Proxmox VE ISO downloads: 9.2-1, 1.71 GB, with the SHA256 sum
- Proxmox VE installation guide: Secure Boot from 8.1, filesystem options, password length, notifications
- Proxmox VE installation media: Etcher, Rufus in DD mode, the UNetbootin warning
- Proxmox VE package repositories: the deb822 entries,
Enabled: no,apt modernize-sources - Proxmox ZFS on Linux: the ARC default, the pre-8.1 defaults,
update-initramfs -u -k all - Proxmox VE VM docs and container docs: VirtIO SCSI single, CPU types, application containers
- Proxmox container template index: debian-13-standard and ubuntu-26.04-standard
- Proxmox VE pricing: Community subscription terms
- HP EliteDesk 800 G4 Desktop Mini maintenance and service guide: F10 Computer Setup, F9 boot menu, VTx and VTd defaults
Email corrections to contact@techfuelhq.com.
After Proxmox is running: the ZFS pool setup guide covers creating RAIDZ1/mirror pools and tuning ARC for a shared host. The Proxmox VM Capacity Planner estimates how many VMs your mini PC can run.
Frequently asked questions
How long does it actually take to install Proxmox on a mini PC?
Do I need to pay for Proxmox?
What mini PC should I install Proxmox on?
VM or LXC for a self-hosted app?
How do I back up my Proxmox VMs?
Can I cluster two mini PCs running Proxmox?
Sources and corrections
- Last updated
- Methodology
- See our methodology for research and review standards.
- Update log
- 2026-09-22 — Checked against the Proxmox VE 9.2 sources on 2026-09-22: roadmap (9.2 released May 21, 2026 with ZFS 2.4; freeze of Windows 11/2022/2025 guests on Intel hosts with CPU type host and VBS, fixed in qemu-server 9.2.0), ISO download page (9.2-1, 1.71 GB), pve-docs installation, installation-media, package-repository, ZFS, qm and pct chapters, the template index at download.proxmox.com (debian-13-standard, ubuntu-26.04-standard) and the pricing page (Community 120 euros per CPU socket per year). HP’s EliteDesk 800 G4 Desktop Mini service guide for F10, F9 and the VTx default.
- 2026-09-05 — Freshness pass. Re-verified the MS-01 i5-12600H barebone at $439 on Minisforum’s US store, the SER8 Ryzen 7 8745HS 16 GB / 512 GB at $619 and marked pre-order on Beelink’s store, and a Kioxia BG4 256GB M.2 2280 NVMe listing on Amazon (linked without a price: Amazon-derived prices are not published, per ops/scripts/price_ttl_check.py); all prices and availability were read 2026-09-05 and now carry direct retailer links plus a verify-at-purchase caveat. Re-verified the June 2026 U.S. residential average of $0.1834/kWh in EIA Electric Power Monthly Table 5.6.A and Proxmox VE 9.2’s 2026-05-21 release (the 2026-08-05 roadmap entry is the arm64 build) on the official roadmap.
- 2026-08-22 — Cold claim-citation audit (Goal-5 segment 6), sources re-fetched 2026-08-22. The ZFS on Linux wiki puts the ARC default since PVE 8.1 at 10% of host memory clamped to 16 GiB and the unset ZFS default at 50% before ZFS 2.3.0 and 62.5% from 2.3.0 on; the storage-option bullet that said a 16GB box would lose half its RAM without a manual limit contradicted the page’s own step 4 and now states the 8.1+ default, and the troubleshooting answer that named a legacy 50% default now gives both figures (PVE 9 ships ZFS 2.4). ark.intel.com now lands on Intel’s 404 redirector; the Intel ARK source link moved to the live intel.com ARK page (Wayback snapshot 2026-08-21). Package_Repositories (deb822 proxmox.sources, trixie suite) reads as stated. (Corrected 2026-08-24: this note also certified a tteck/community-scripts redirect, which this page does not cite and never did — that check belonged to another page.)
- 2026-08-18 — Electricity-cost refresh: idle-cost figures recomputed at the $0.184/kWh US residential average (EIA Electric Power Monthly, May 2026); the prior $0.14/kWh figure was ~24% stale. Byline update-date reconciled with lastmod.
- 2026-08-14 — Citation-health sweep. Three entries in the primary-sources list were labelled as product or specification pages but linked bare homepages - minisforum.com as the ‘MS-01 product page’, asus.com/displays-desktops/nucs/ as the ‘NUC 14 Pro product page’ (it now 301s to the ASUS homepage), and ark.intel.com as ‘N100 / N305 specifications’. Each resolved 200 and passed link checking while showing a reader none of the specs claimed. Relabelled to what they actually are; the ASUS link was removed outright because every NUC 14 Pro path tested on 2026-08-14 redirects to the homepage.
- 2026-07-12 — Craftsman upgrade. Corrected the repository swap to Proxmox VE 9 / Debian 13 trixie (deb822 .sources format) — the old bookworm .list method silently fails on 9. Updated ZFS ARC guidance for the PVE 8.1+ 10%-of-RAM default. Added a signature time-mapped install timeline, converted the power chart to a self-contained (no external CDN) visual. Verified against pve.proxmox.com Package Repositories + ZFS on Linux wiki.
- 2026-05-06 — Voice cleanup as part of AdSense hardening pass — removed lead-in filler before step list.
- 2026-03-31 — Initial publish.
- Corrections
- Spotted an error or a stale number? Email contact@techfuelhq.com. Confirmed corrections are added to the update log above.